

We’re glad you asked! Not only can you paint Ikea furniture, but painting laminate is actually a less time-consuming process than learning how to paint wood furniture!


Whether you found it in the “as is” bin at Ikea or it’s been in your family for decades, learning how to paint furniture is one of the most affordable solutions to update the look of a piece. Today, we’ll walk you through some of the tried and true steps for how to paint wood and laminate wood furniture from veteran DIYers who have learned the hard way how to paint furniture the right way for a picture-perfect finish every time.
Photo Courtesy of @arayofsunlightdesign
Tack cloth & water
Wood filler (optional)
Particle mask and a dry, well-ventilated space
Drop cloths
(3) Mini foam rollers & (3) paint trays
150 and 220 grit sandpaper, or palm sander
PRO TIP: If your final paint color will be dark, consider tinting your primer to a similar color as your finish paint.
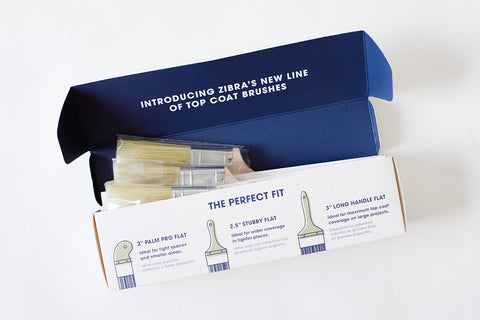
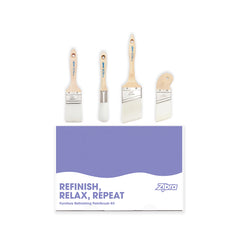
Detail Brushes, Top Coat Paintbrush or a Furniture Paintbrush Kit for tight corners and hard to reach spots
Paint & mixing sticks
A water-based polyurethane topcoat sealer. Topcoats come in matte, satin, semi-gloss, and gloss finishes to give you either flat or shiny finishes. This choice comes down to personal preference.
One of the first steps to learning how to paint wood furniture is how to properly protect yourself and your floors! To start, place your piece down on a drop cloth to protect your floors from paint drips or spills. Wear a particle mask to help minimize the amount of dust, particles, primer, or paint fumes you inhale, and paint in a dry, well ventilated area.

Photo courtesy of DIY Network
Remove any hardware, pulls, or knobs you can. Fill any imperfections, knots, or holes you don’t want showing up in your final project with a wood filler. Once wood filler dries, lightly sand your piece with a medium grit 150 grit sandpaper or an orbital sander. The goal here is to create a surface for the paint to grab onto, so don’t go overboard with sanding. One pass around the piece should suffice. Be sure to sand with the grain rather than against it. Once you’re done sanding, wipe down your piece with water and tack cloth to remove sanding dust.
PRO TIP: When learning how to paint furniture, do yourself a favor and skip the paper towels or “lint free” cloths. Using tack cloth is the most effective for clearing sanding dust without leaving behind any lint, fabric, or other materials that could end up in your final product.
Now that your furniture is clean and dry, you’re ready to prime! Mix your primer and pour it into the paint tray.

Photo courtesy of Just the Woods
Using your mini foam roller, prime the large surface areas with a thin layer of primer. Use a detail brush for tight corners, detailed panels or hard to reach areas. Zibra’s Round Paint Brush is great for painting furniture with curved surfaces, ornate details and spindles. If moldings and routed edges need painting, the Fan Paintbrush will take care of them!
Once your first coat is on and dry according to the instructions on the can of primer, use your 220 grit sanding paper to lightly sand the surface and sand away any drips. This will help give the paint something to grab on to for a better finish. Wipe away sanding dust with a tack cloth.
When painting furniture, it’s best to do multiple thin coats. With a clean mini foam roller, apply a thin coat of paint and allow it to dry completely based on the instructions on your specific paint type. Sand between coats with your 220 grit sandpaper and wipe away dust with a clean tack cloth. Repeat this paint and sanding routine for at least two coats.
 Photo courtesy of Market House Restorations
Once you’re happy with your paint job, use a new mini foam roller or Top Coat Paintbrush to apply a thin topcoat. This will help seal the piece and keep it looking great for years. Be sure to take your time with this step! Rushing this could jeopardize the outcome. We recommend going over this coat lightly with your foam roller to smooth out any possible bubbles.
Once your top coat is dry and you’re happy with your piece, go ahead and reattach knobs, pulls, and hardware and enjoy your freshly painted piece of furniture!
Whether you’re a diehard DIYer or a newbie to the furniture painting world Zibra makes it easy to find the inspiration, Paintbrush Kits, and Painting Accessories which you need to master how to paint furniture and all future paint projects. Shop today and discover the Zibra Difference!
We’re glad you asked! Not only can you paint Ikea furniture, but painting laminate is actually a less time-consuming process than learning how to paint wood furniture!

Learning how to properly paint a room can save you time, money, and heartache. Today, we’ll walk you through the basics of how to paint a room for a picture-perfect bedroom you’ll be proud to show off.
| Item | Price | Qty | Total | |
|---|---|---|---|---|
| Subtotal |
$0.00 |
|||
| Shipping | ||||
| Total | ||||